Introduction to Painting Fundamentals and Essential Techniques
Painting is an art form that has captivated people for centuries. It allows us to express our creativity, tell stories, and capture moments in time. For beginners, mastering the basics of painting can be daunting. This guide will introduce you to essential painting techniques and fundamentals that will help you create amazing works of art.
We’ll cover the basics of color theory, how to choose and prepare your supplies, the different brushes you could use, basic mark making and application, how to blend and shade, how to edit and improve your paintings, composing and planning, perspective, painting with light and shadow, and giving your work a professional finish. With practice, you’ll find that painting can often be easier than it seems.
Color Theory & Mixing Basics
Color theory is an essential part of painting, and learning the basics of it now will help you use color more effectively in your future artwork. Before you can begin mixing different colors, you’ll need to understand the concept of a color wheel. A color wheel is a visual representation of the primary and secondary colors.
The three primary colors of red, yellow, and blue cannot be created by mixing other colors together. All other colors are created by combining two or more of these three primary colors. For example, mashing together equal parts of red and yellow creates a secondary color, orange. The combination of yellow and blue produces green, while the blend of red and blue gives us violet.
A fuller understanding of color theory will help you create bold and vibrant paintings that draw the eye. Breaking colors into warm and cool groups is also helpful. Warm colors—reds, oranges, and yellows—are often associated with energy and action, while cool colors—blues, greens, and purples—have a calming effect.
Mixing paint is another part of color theory. Start by using a palette, a flat surface that you can put paint on. If you’re mixing complementary colors—colors that are opposite each other on the color wheel—start by adding a dab of each color in the middle. Then, using a brush, mix the paint together until you’ve achieved the desired result.
Choosing & Preparing Your Supplies
When you’re a beginner in painting, it can be difficult to understand what supplies are necessary and how to prepare them for use. To get started, it’s important to select the right supplies for the type of painting project that you have in mind. Choosing the right supplies will help you create quality art pieces and save you time.
First, you should decide what type of paint to use. Depending on the type of painting that you want to do, you may choose either oil, watercolor, or acrylic paint. Each type of paint has its pros and cons, and the best one for you will depend on your goals. Oil paints are popular for their vibrant colors and long-lasting results, whereas watercolors provide an interesting mix of opaque and transparent colors. Acrylic paints are a great choice for those who want to create vivid works of art quickly.
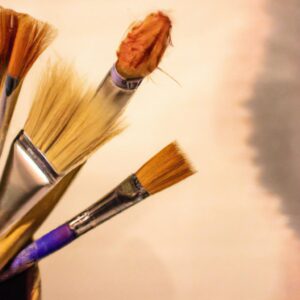
Once you’ve selected the type of paint, it’s time to pick out your brushes. For beginners, it’s best to start with basic brush shapes such as round, flat, and fan. Round and flat brushes are great for creating details, whereas the fan brush can help with blending and shading. Additionally, you’ll need to buy a good quality palette knife to mix paint colors with, as well as canvases to work on.
Finally, you need to make sure that you have all the necessary materials to support your painting projects. This includes masking tape to secure the canvas to the wall, newspaper for protecting surfaces, and a paper towel for wiping off excess paint. There are also a variety of other tools and supplies that can help enhance your painting experience and should be added to your kit.
Using Different Brushes
When beginning to paint, using the right brushes is critical for success. Every brush shape and size has its own purpose, so it’s important to get to know the range available. The four main types used for painting are round, flat, filbert and fan brushes.
Round brushes are ideal for detail work and line painting. They come in a range of sizes, giving you greater control over the width and length of your strokes. Flat brushes can be used for broad strokes, creating large blocks of colors. These brushes are great for blending as they will disperse the pigments into thin streaks, producing a smooth finish. Filbert brushes offer more precise control than flat brushes, allowing for fine details like lines, dots, and curves, making them a good all-round brush choice. Lastly, fan brushes are used for blending and shading. Use them to create fine, airy strokes, and to diffuse and soften edges.
Experiment with a selection of brushes, and practice using each one to get to know how each brush type performs. Different paint types require different brushes too, so factor that into your purchase. Watercolors need softer bristles, while acrylics and oils require thicker and stiffer bristles. Knowing the characteristics of each brush type and when to use them will help you choose the right one for any given painting task.
Basic Mark Making and Paint Application
Having the right supplies and understanding the basics of color is essential to creating beautiful paintings. With that said, the next step in mastering the fundamentals is learning how to use those items to create the marks you want.
Mark-making is just a fancy phrase for putting paint onto your painting surface. Whether you are using a brush, a palette knife, or a stick, the way you apply the paint will affect the outcome of your art.
Before you start painting, think about what kind of marks you want to make. Do you want smooth, textured lines? Bold, opaque colors? Subtle blends of color? Knowing what kind of marks you want before you start will help you apply the paint correctly.
When you are ready to apply paint, keep in mind the type of brush you are using and the pressure you apply. Using a soft brush with light pressure will give a softer look, while harder brushes and stronger pressure will give you more control of the paint and can create sharper lines.
No matter what type of mark you are trying to make with paint, it will take practice and experimentation to get results you like. Don’t be afraid to try out different techniques and tools to find what works best for you.
Blending and Shading
Painting requires a special technique to help create the illusion of form, shape and scale. Blending colors together can help the painter create organic transitions of color. This technique is important when creating realistic looking figures, landscapes, or objects. In addition, understanding how to add shades into the painting will give your artwork a more accurate portrayal of the things you’re trying to represent.
Shading can be used to create the illusion of depth in the painting. It can also be used to create highlights and shadows that can bring the painting to life. Gradients of color allow forms to look more natural. When blending and shading, make sure to start with an even layer of paint and slowly build up by adding various layers and shades. Keep in mind the direction of light when emphasizing certain areas of the painting.
Practicing techniques like hatching, cross-hatching, feathering, stippling and scumbling will help you understand and gain control over the process of creating shading. These techniques can be applied to create a range of values from bright to dark. The more you practice these techniques, the more versatile you will become in terms of controlling light and darkness in your painting.
Editing and Improving your Painting
As you work on your painting, you are likely to find flaws or areas that require further improvement. Editing techniques are a great way to adjust your painting and make it something special. There are some great tools available for editing that can help you make your painting perfect.
One editing tool you can use is cropping. This will allow you to cut away excess areas of your painting that don’t fit with the overall composition. You can also use layers to create new effects or adjust different sections of your painting. Additionally, you can use various filters and tools such as Dodge and Burn to adjust colors and tones in your painting.
Once you are happy with how your painting looks, you can add finishing touches. This could include anything from adding in a few more brush strokes to creating special effects. You can also go over the details with a fine brush and make exact adjustments. After you have finished editing your painting, you can go back and adjust colors and tones if necessary.
Don’t forget to step back and look at your painting from time to time to see what needs adjusting. Approaching your painting objectively and looking at it from all angles will help you to spot any flaws or areas that require extra attention. Once you feel satisfied and happy with your painting, you can proudly display it. With the right editing and finishing techniques, you can easily improve any painting!
Compositions and Planning
When it comes to painting, composition is key. This refers to the arrangement of elements in an artwork and how they work together. Learning composition basics will help you create strong, visually pleasing paintings.
The best way to start planning your paintings is to make sketches. Sketching is a great way to explore compositions without having to commit to the final product. You can try out a variety of different compositions until you find one that works. Make sure to keep a small sketchbook handy so that you can quickly make sketches whenever you have an idea or inspiration.
You may also want to make use of reference photos or images to help you plan your paintings. Reference photos are great for understanding the relationships between different elements within a composition and help to ensure that forms look realistic. Imagining and sketching things on paper before committing to paint can save time and frustration in the painting process.
As you become more experienced, you’ll find creative ways to adapt conventional composition rules and create visually interesting and unique artworks. Don’t be afraid to experiment and push boundaries with your compositions.
Perspective and Depth
When exploring the realm of painting, mastering the fundamentals of perspective is essential for creating a realistic looking painting. Perspective can add a great depth and feeling to an image, making it look much more lifelike.
Perspective is the illusion of 3D on a flat canvas. When attempting to create depth and perspective, there are a few key concepts to remember. The most important is the concept of size. The size of an object, relative to the other objects in your painting, will help determine the sense of depth in your painting. Objects further away should always look smaller than those that are closer to the viewer.
Another key concept to consider is angles. The angles of the objects in your painting, in relation to each other, will also help determine the sense of depth. If one object is drawn at a sharper angle than the other in the painting, then it will appear to be closer to the viewer. Additionally, objects that are very close to the viewer should have straight lines as if the object is taking over a portion of the canvas.
The use of color can also be used to trick the eye into seeing an illusion of depth. Warmer colors, such as reds and yellows will appear closer to the viewer, while cooler colors such as blues and greens seem to be far away.
Finally, you can experiment with shading and highlights to give your painting a three-dimensional feel. Highlighting certain portions of the painting will give a sense of light direction and shading specific sections will give your painting shadow and depth.
Painting With Light and Shadow
Painting with light and shadows can be a tricky concept for beginner painters. But after some practice, you will soon be able to capture the nuances of light on your surfaces and create beautiful works of art.
In order to learn to effectively use light and shadow in your paintings, you need to become familiar with the concept of value. Value is the range of lightness and darkness in a painting. Darker values create shadows, while lighter values create highlights. To read more about value, you can check out this article.
Once you have a good understanding of value, it is time to start experimenting. You can begin with your basic brushstrokes and then start to play around with how light and dark colors interact with each other. When you start to add light and shadows, pay attention to where light is coming from. This will help you to create realistic lighting effects in your painting.
Another great way to get used to painting with light and shadows is to practice on photographs. Look at photographs that contain a variety of lighting situations, such as backlit subjects, side-lighting, and low lighting. Then, try to replicate the lighting effects in your painting.
Finally, remember that shadows are just as important as highlights when it comes to creating a painting with depth. Shadows add depth and dimension to a painting and without them, your painting may look flat. So experiment with shadows and see what kind of interesting effects you can create.
Giving Your Paintings Professional Finishes
As a painter you want to make sure your paintings look as professional and polished as possible. The best way to do that is by adding a final finishing touch. The finishing touch can range from using wax or varnish to add a protective layer, glazing, or other decorative finishes like lacing.
For watercolors, the addition of wax or varnish can help protect and preserve the colors over time. Adding a layer of wax or varnish will also give the painting a nice sheen and glossy finish. A glaze is a thin layer of paint that is applied over another layer of paint, usually a dark color to add depth and a richer hued tone. This type of finish is often used in landscapes and with oil paints. It’s a great way to give dimension and richness to your painting.
Lace or lace-like patterns can be added to a painting to enhance the overall design. Typically, the pattern is applied with a clean brush or sponge, taking care not to displace the original paint. This technique is commonly used in portraiture and figurative painting.
No matter what type of finish you decide to go with, it is always important to take your time. Carefully check your work as you go and make sure you have the desired result before moving onto the next step. With patience and practice, you can create beautiful, professional-looking paintings.
Painting can be a fun and rewarding activity. It is a great way of expressing yourself and your creativity, as well as providing a window into another world of possibilities. In this guide, we explored the fundamentals of painting and essential techniques for beginners, learning the basics of color theory and mixing, finding and preparing supplies, understanding different brush types, basic mark making and paint application, blending and shading, editing and improving paintings, creating compositions and planning, grasping perspective and depth, painting with light and shadow, and giving your paintings professional finishes. With all this knowledge, you should have no problem mastering the fundamentals of painting and becoming a successful artist.
comments: 0